Account Management page
To access Account Management, click Account from the menu. Under Account, click Account Management.
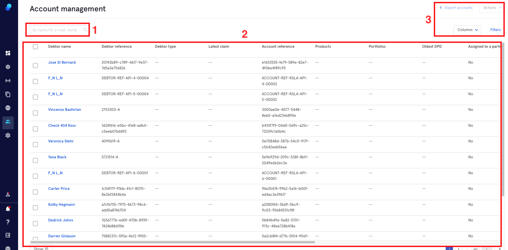
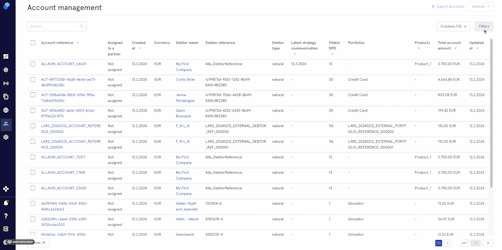
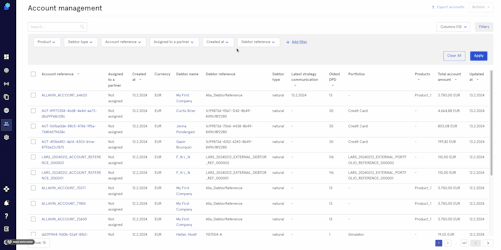
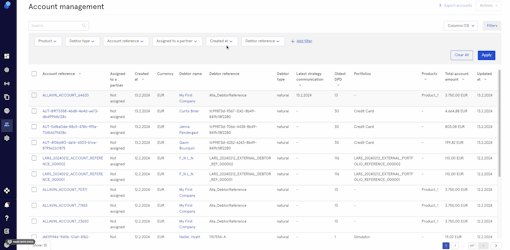
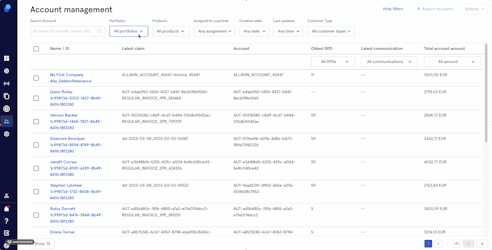
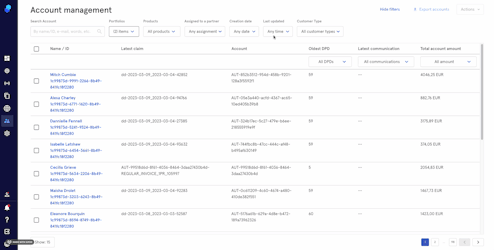
Account Management
Once inside Account Management you'll find:
- A search box where you can search by Name, ID, email, words...
- A list of the current accounts in the system (depending on what you choose in the columns dropdown there will be more/less information on screen)
- The Filters button, Export Accounts button, Columns dropdown, Actions Dropdown
Columns
By clicking on the ‘columns’ dropdown you can choose which columns and info will be visible.
- Select the columns of your preference or click select all
- Click on ‘apply’
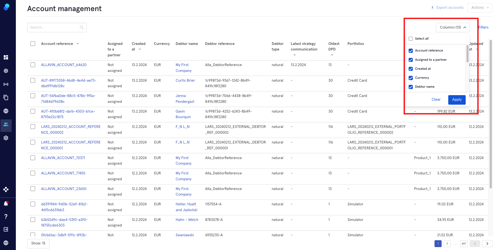
These columns will allow you to show on screen the following:
- Account reference
- Assigned to partner
- Created at
- Currency
- Debtor name
- Debtor reference
- Debtor type
- Latest strategy communication
- Oldest DPD
- Portfolios
- Products
- Total account amount
- Updated at
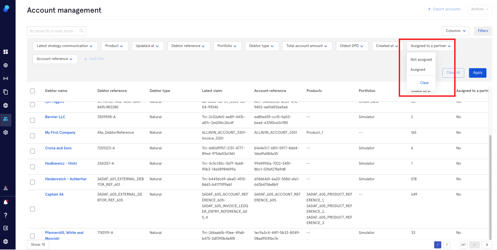
Filters
The filters will allow you to be more concrete when gathering information. To start using the filters:
- Click on the ‘filters’ button.
- Choose the filters you’d like to see by clicking on ‘Add filter’ and selecting from the dropdown.
- Click ‘Apply’ to proceed or ‘clear’ to undo.
Please note that there are 4 default filters which you can remove by clicking on the 'x’
- When selecting from the filters you can:
- Click on 'apply'/clear in the selected filter to display/clear the selection.
-
- Click ‘apply’ / ‘clear all’ on the top right to display the selection made in each of the filters/clear all the filters at the same time.
The Portfolio, Product and Account Reference filters will work as follows:
Click on the dropdown. From here you'll be able to:
- Use the search box to type the name of the product/portfolio or
- Select a specific product/portfolio or
- Select all the products/portfolios.
- Click on the 'filter' button to filter or
- Click 'clear' to undo.
- Assigned to partner, Debtor type:
Choose from the dropdown:
a. Assigned/Legal
b. Not assigned/Natural
c. 'Clear' button
- Created at, Updated at, Latest Strategy Communication and Oldest DPD filters
You can:
- Select a date from the dropdown (last 7, 14 and 30 days) , select a custom date range or Clear
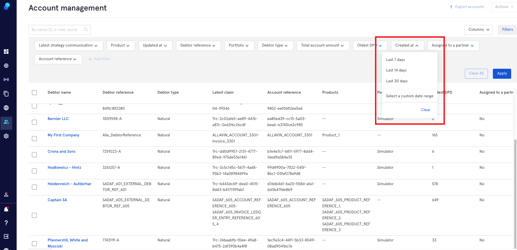
To select a Custom Date Range:
a. Select the first day of your date range and then,
b. Click on the last day of your date range.
Bulk Actions - Export Accounts
This feature will allow to to bulk select accounts and export them to a CSV file.
- Select the accounts you want to export by clicking on the checkbox you'll see on the left side of your screen. You can also select all the accounts by clicking on the checkbox you'll see on top, (next to 'Name/ID).
- Click on 'Export Accounts'
- You'll see 3 toasts in this order:
a. Files preparing for download
b. Creating Report
c. File generated. You can download the files using the link or go to Dashboard>Reports to download it later

Bulk Actions - Create Task
To bulk create a task:
- Select the accounts by clicking on the checkbox you'll see on the left
- Click on the Actions dropdown
- Click on Create Task
- A modal will appear on the right side of your screen where you can:
- Assign the task to a queue or group
- Select queue/group
- When selecting a queue: select user
- Add a due date/select no due date
- Add tags
- Add a note
- Click on Create Task to proceed or click Cancel to undo.

To learn more about of all you can do when checking a specific Account page, please click here.